简单疯马皮卡套手工DIY图解教程
传统手工 |
皮革 / 作者:逆时光
/ 时间:2021-06-08 /449℃

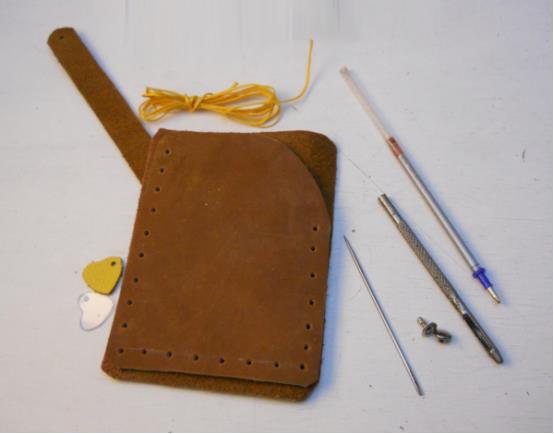
准备材料:如图皮料、扁蜡线。工具:锤子、冲子、银线笔、剪刀、刀、针。
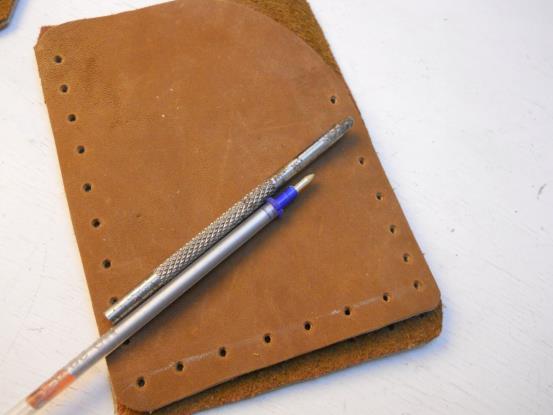
第一步:用银线笔在皮料上做好标记,然后用冲子和锤子打孔。
第二步:顺着打好的孔,缝合包包
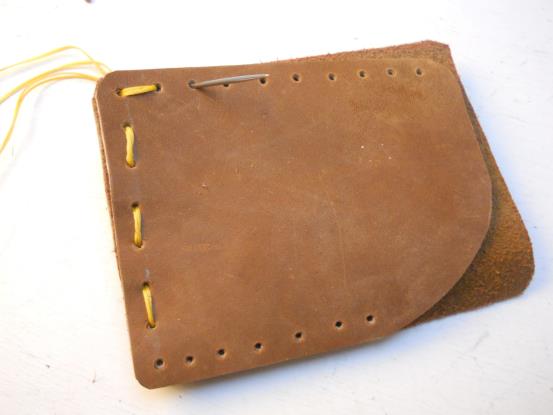
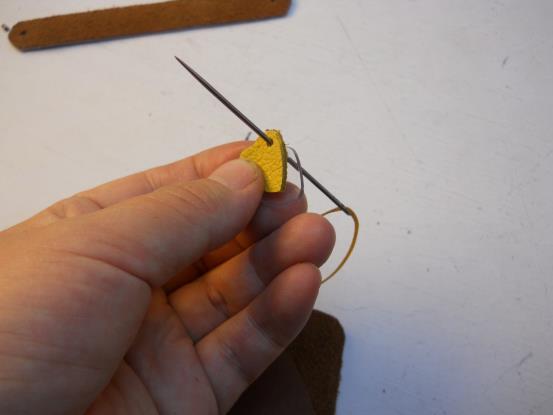
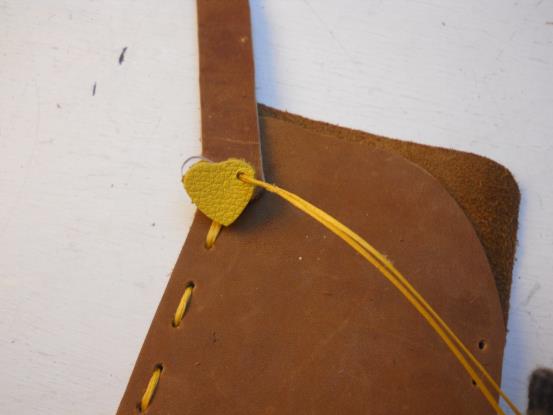
第三步:缝到左上角的时候把黄色的小心型皮料一起缝上去。
第四步:短皮条也一起缝上去。
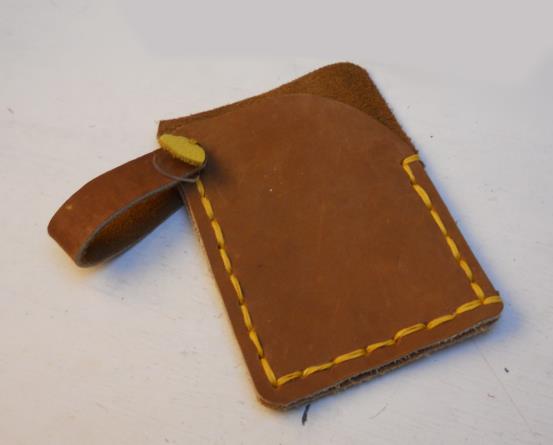
第五步:缝到头再反过来缝一遍。

完工:
→ 名字网微信公众号:【roudingdiy】 ←
本站提供信息存贮空间服务,部分内容由用户上传,如有侵权,请提供简单说明,将于7日内处理。
本站原创内容未经书面许可不得以任何形式复制、传播、发表,可联系本站购买商业服务。
